 Construction:
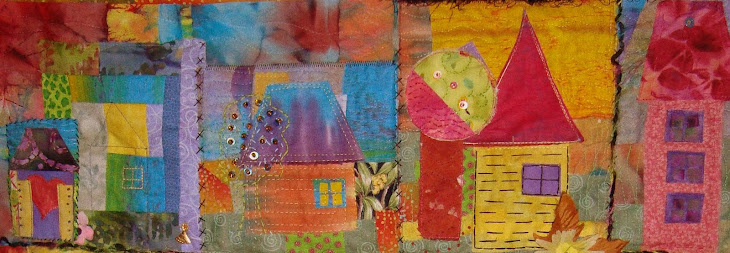
1. Cut and machine piece four squares to form background fabric
2. Cut shapes; raw edge machine appliqué shapes to background fabric
3. Add two borders to form quilt top
4. Cut batting and lay quilt top on batting
5. Hand quilt (stitch in the ditch) center lines and seam between background fabric and inner border
6. Machine stitch over shapes (again)
7. Hand embroidery peace signs using embroidery floss
8. Hand embroidery center heart shape using silky thread
9. Sew seed beads around wing shapes and to face shape
10. Backing: cut backing fabric and batting (because I didn’t have interfacing and someone said that if there wasn’t going to be a lot of quilting to add interfacing to keep the back of the quilt from sagging)
11. Quilt backing and batting using grid design (because I was using batting, I felt I should quilt it). Sew on sleeve and label.
12. Using pillow construction, sew front and back together. Turn and iron.
13. Stitch along edge
14. Hand quilt seam between two borders.
15. Hand embroider heart shapes on sides
16. Hand embroider lines within center heart
BTW, I used contact paper cut in the heart shapes and attached to the fabric as my guide for hand embroidery. Pretty brilliant, eh?

But oh, what a mess! The quilting is terribly bunched up and I have no idea how to fix it.

The only thing I can do is to try and understand where I went wrong. If anyone reading this wishes to help me here, I’d truly appreciate it. So, I think I should have followed this path instead:
1. Cut and machine piece four squares to form background fabric
2. Add two borders to form quilt top
3. Cut batting and lay quilt top on batting
4. Hand quilt (stitch in the ditch) center lines and seam between background fabric and inner border
5. Cut shapes; raw edge machine appliqué shapes to fabric & batting
6. Hand embroidery peace signs using embroidery floss
7. Hand embroidery center heart shape using silky thread
8. Sew seed beads around wing shapes and to face shape
9. Backing: cut backing fabric and interfacing (lite)
10. Sew on sleeve and label.
11. Using pillow construction, sew front and back together. Turn and iron.
12. Stitch along edge
13. Hand quilt seam between two borders.
14. Hand embroider heart shapes on sides
This way, the quilt sandwich would only be connected with one large boarder and the smaller hart shapes.
Boy, do I need to back up and learn some basic quilting techniques!!


1 comment:
I can't determine where it went wrong. This has a strong folk art look to it. How about taking it further in that direction by adding more quilting. A suggestion would be big stitches with thick colored threads. This should flatten the overall look and not only be acceptable, but add to the primitive style.
Post a Comment